• Recent Posts By Label Gadget For Blogger

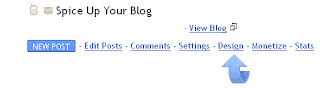
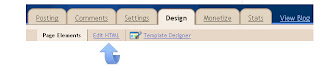
    Step 1. In your Blogger Dashboard click > Design > Edit Html 


    Step 2 . Find the following piece of code in your blogs Html : (Click Ctrl and F for a search bar to help find the code - More Info)

    ]]>

    Step 3. Copy and paste the following code Directly Above / Before ]]>

    /*** Recent Labels Gadget Css ***/
    img.label_thumb{
    float:left;
    padding:5px;
    border:1px solid #8f8f8f;
    background:#D2D0D0;
    margin-right:10px;
    height:55px;
    width:55px;
    }
    img.label_thumb:hover{
    background:#f7f6f6;
    }
    .label_with_thumbs {
    float: left;
    width: 100%;
    min-height: 70px;
    margin: 0px 10px 2px 0px;
    adding: 0;
    }
    ul.label_with_thumbs li {
    padding:8px 0;
    min-height:65px;
    margin-bottom:10px;
    }
    .label_with_thumbs a {}
    .label_with_thumbs strong {}

    Step 4. Find the following piece of code in your blogs Html : (Click Ctrl and F for a search bar to help find the code - More Info

    /head

    Step 5. Copy and paste the following code Directly Above / Before

    script type='text/javascript'>
    //<![CDATA[
    function labelthumbs(json){document.write('
      ');for(var i=0;iif(entry.link[k].rel=='alternate'){posturl=entry.link[k].href;break;}}var thumburl;try{thumburl=entry.media$thumbnail.url;}catch(error)
      {s=entry.content.$t;a=s.indexOf("var postdate=entry.published.$t;var cdyear=postdate.substring(0,4);var cdmonth=postdate.substring(5,7);var cdday=postdate.substring(8,10);var monthnames=new Array();monthnames[1]="Jan";monthnames[2]="Feb";monthnames[3]="Mar";monthnames[4]="Apr";monthnames[5]="May";monthnames[6]="Jun";monthnames[7]="Jul";monthnames[8]="Aug";monthnames[9]="Sep";monthnames[10]="Oct";monthnames[11]="Nov";monthnames[12]="Dec";document.write('
    • ');if(showpostthumbnails==true)
      document.write('');document.write(''+posttitle+'
      ');if("content"in entry){var postcontent=entry.content.$t;}
      else
      if("summary"in entry){var postcontent=entry.summary.$t;}
      else var postcontent="";var re=/<\S[^>]*>/g;postcontent=postcontent.replace(re,"");if(showpostsummary==true){if(postcontent.lengthelse{document.write('');postcontent=postcontent.substring(0,numchars);var quoteEnd=postcontent.lastIndexOf(" ");postcontent=postcontent.substring(0,quoteEnd);document.write(postcontent+'...');document.write('');}}
      var towrite='';var flag=0;document.write('
      ');if(showpostdate==true){towrite=towrite+monthnames[parseInt(cdmonth,10)]+'-'+cdday+' - '+cdyear;flag=1;}
      if(showcommentnum==true)
      {if(flag==1){towrite=towrite+' | ';}
      if(commenttext=='1 Comments')commenttext='1 Comment';if(commenttext=='0 Comments')commenttext='No Comments';commenttext=''+commenttext+'';towrite=towrite+commenttext;flag=1;;}
      if(displaymore==true)
      {if(flag==1)towrite=towrite+' | ';towrite=towrite+'More »';flag=1;;}
      document.write(towrite);document.write('
    • ');if(displayseparator==true)
      if(i!=(numposts-1))
      document.write('');}document.write('
    ');}
    //]]>

    Step 6. Save your template, we have added the Css to style the gadget and the script to make the gadget work.Now we just have to add the gadget code to your sidebar in a Html/Javascript gadget.

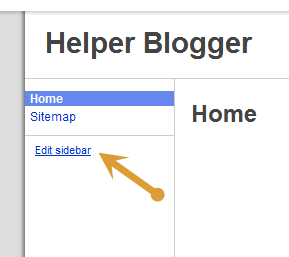
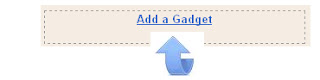
    Step 7. Click back to your Design Page > Click Add A Gadget > Choose Html/Javascript from the pop up menu :


    Step 8. Copy and paste the code below into the Html/Javascript gadget.

    script type='text/javascript'>var numposts = 3;var showpostthumbnails = true;var displaymore = false;var displayseparator = false;var showcommentnum = false;var showpostdate = false;var showpostsummary = true;var numchars = 80;


    Important - You must add the name of the label you want to to the above code.Replace LABEL in red with the label name.

    Example - If i wanted to display posts from the gadgets label i would replace LABEL withGadgets.
    (http://www.spiceupyourblog.com/search/label/Gadgets/)

    If your label is made up of more than one word it can get confusing as the space between the words will be filled automatically as shown below :

    http://www.spiceupyourblog.com/search/label/Social%20Media 

    If you are going to use a label with more than one word make sure to first see how the label appears.

    Step 9. Save the gadget and you can drag and drop it into the position you want it displayed on your blog.

    Drop Your Comments, Views And Opinions Below.
    Read More ->>

    Blogger Trick: How To Post HTML Codes


    If you have a blog theme tutorial learn about blogs, you definitely have to post someHTML Codes. For Beginner Blogger, may get a little error when publishing the post. Because the post to include some of the HTML code does not write like a normal way. So to enter HTML code in the Post, we have to change some of the code. Here I will explain to you some code that should be changed.
    Before we start, please understand these codes with the descriptions in the list below.


    Before (Original)
    After (Changed)
    Description
    <
    <
    Marks the beginning of code lines
    >
    &gt;
    Marks the end of the cover code
    &
    &
    Mark of "and"
    "
    "
    Mark of double quotes
    ±
    ±
    Mark of plus minus
    Space
     
    Mark of space
    ©
    ©
    Mark of copyright
    ®
    ®
    Mark of Registered


    For example:

    This is your original code that you wanna post:

    Blogger Trick Blog


    To post, you must change the code to be like this:

    <br/><br/>

    <code>

    <a href="http://bloggertrick4u.blogspot.com/" target="_blank">Blogger Trick Blog</a>

    </code>


    This tag <code> and </code> is for show your HTML code on your post. But don't forget to change the code as the table above. How? Do you understand? If you do not understand about this post, please leave your comment or question under this page. Good luck.
    Read More ->>

    Girl Dancing !!


    Read More ->>


    Recommend us on Google!
    Pin It On Pinterest
    Follow Me on Pinterest

    Read More ->>

    How to Make Windows XP Genuine : 100% Free & Working

    It is a known fact that most users are using the pirated version of Windows and this has prevent them from enjoying some Windows benefit such as automatic updating, unable to set a preferred wallpaper and other stuffs. Windows will always show an error notification if you’re using its pirated version. For users using the pirated version here is a simple trick you can apply to make your Windows XP genuine without any hassle.
    Steps to Make Windows XP Genuine

    1. Open notepad program on your computer and then paste the copy and paste the code below into it.
    Windows Registry Editor Version 5.00
    [HKEY_LOCAL_MACHINESOFTWAREMicrosoftWindows NTCurrentVersion]
    “CurrentBuild”=”1.511.1 () (Obsolete data – do not use)”
    “ProductId”=”55274-640-1011873-23081″
    “DigitalProductId”=hex:a4,00,00,00,03,00,00,00,35,35,32,37,34,2d,36,34,30,2d,
    31,30,31,31,38,37,33,2d,32,33,30,38,31,00,2e,00,00,00,41,32,32,2d,30,30,30,
    30,31,00,00,00,00,00,00,00,86,56,4e,4c,21,1b,2b,6a,a3,78,8e,8f,98,5c,00,00,
    00,00,00,00,dd,da,47,41,cc,6b,06,00,00,00,00,00,00,00,00,00,00,00,00,00,00,
    00,00,00,00,00,00,00,00,00,00,00,38,31,30,32,36,00,00,00,00,00,00,00,b5,16,
    00,00,83,83,1f,38,f8,01,00,00,f5,1c,00,00,00,00,00,00,00,00,00,00,00,00,00,
    00,00,00,00,00,00,00,00,00,00,00,00,00,00,00,00,00,66,e5,70,f3
    “LicenseInfo”=hex:33,b7,21,c1,e5,e7,cd,4b,fd,7c,c6,35,51,fd,52,57,17,86,3e,18,
    d3,f4,8c,8e,35,32,7b,d1,43,8d,61,38,60,a4,ca,55,c9,9a,35,17,46,7a,4f,91,fc,
    4a,d9,db,64,5c,c4,e2,0f,34,f3,ea
    [HKEY_LOCAL_MACHINESOFTWAREMicrosoftWindows NTCurrentVersionWPAEvents]
    “OOBETimer”=hex:ff,d5,71,d6,8b,6a,8d,6f,d5,33,93,fd
    2. Save the file as GenuineXP.reg.

    3. Click on the GenuineXP.reg file to make your Windows XP genuine.

    You can also try the following keys on your Windows XP
     K64GB-6KPXK-R3H8F-6GQ79-8PBK8.
    WCBG6-48773-B4BYX-73KJP-KM3K3. 


    You can now enjoy the full benefits genuine Windows XP users now get since your own OS is now genuine.

    Stay Informed, Inspired and Motivated With Our Free Daily Tips.
    Add Your Email Now, Don’t Worry, Your Email Address Is Secure:
    Read More ->>

    How To And Where To Upload .swf Files ?


    How To Upload SWF Object

    • First go to Google Sites.
    • Sign In/Sign Up to your account.
    • Click On Sidebar.

    • Click on Attachments Tab and  hit the Upload the button.


    • Upload your file.


    • After uploading successfully you will see View And Download links just right click on download link and select the copy link address.


    Now you have the link for your uploaded SWF File.

    UPDATE - Your Uploaded SWF File Link will look like this :

    https://sites.google.com/site/yoursite/24049.swf?attredirects=0&d=1

    Remove the text after ? sign.

    Now your link will look like this

    https://sites.google.com/site/yoursite/24049.swf

    Now copy the link and you are done...

    What Next?

    In next post I will provide embed code generator so that you can easily use your flash file in your blog.Just wait and watch....

    I hope you will surely like this tutorial.If you think that this post is helpful then don't forgot to share it with your friends.Thanks... :) Have a nice day...

    Read More ->>

    Huawei C8655 and U8661 Root လုပ္နည္း


     ေျဖ ->C8655 လုပ္နည္းကေတာ ့U8661 နဲ ့တူပါတယ္... 8655 အတြက္ေဆာ့၀ဲက ေအာက္မွာပါ
    C8655 Root software download

    Huawei U8661 Root လုပ္နည္း 

    Huawei Series မ်ား အရမ္းေကာင္း လာျပီး ေစ်းႏူန္း သင့္တင့္ မူေၾကာင့္ လူသံုး မ်ားတဲ. Brand တစ္ခုျဖစ္လာခဲ. ပါျပီ။
    အခု အခါ Huawei U8661 Root လုပ္နည္း ကို တင္ျပပါမယ္။
    အရင္ ဆံုး
    Huawei  Driver ကို Downloadဆြဲပါ။
    ျပီးလ်ွင္ Phone ကို Power ပိတ္ပါ။Power ပိတ္ျပီး လ်ွင္ 10s ေလာက္ ေစာင့္ပါ။
    ျပီးလ်ွင္ VOL DOWN + POWER ကို ႏွိပ္ ပါ။Bootloader ရပ္ေန ပါလိမ္မယ္ ။ျပီးလ်ွင္ USB ၾကိဳး ကို ခ်ိတ္လိုက္ ပါ။
    ျပီးလ်ွင္
    Recovery Super Click.zipကို Download ဆြဲပါ။
    ျပီးလွ်င္ Zip ဖုိင္ ကိုျဖည့္ပါ။ Folder ထဲမွ
    install-superrecovery-windows.bat ကို Run လိုက္ပါ။ျပီးလွ်င္ ဖုန္းကို Battery ဆြဲျဖဳတ္လုိက္ပါ။
    Battery ျပန္တပ္ပါ။VOL UP +POWER ကို ႏွိပ္ပါ ။ Android အရုပ္ေလး တက္လာျပီး အလုပ္လုပ္ေန လိမ္.မည္။
    5s ေလာက္ ၾကာလွ်င္ Recover Mode တက္လာလိမ့္မည္ ။Recovery MODE မွ Reboot System Now ကို ႏိွပ္ပါ။
    Root လုပ္တာ ျပီးဆံုး သြားပါျပီး။ဖုန္းျပန္တက္ လာလိမ့္မည္။ Root လုပ္ဖူးသူတိုင္္း Superuser အရုိးေခါင္း ေလး လိုက္ရွာလိမ္.မည္။မရွာ ပါနဲ. မရွိပါဘူး P:။
     Root Explorer ကို Downloadဆြဲပါ။ျပီးလ်ွင္ Root Explore Install လုပ္ပါ။ Superuser လာေမးလွ်င္  Grant ကို ႏွိပ္ပါ။Root ျဖစ္သြားပါျပီး။

    Font တည္.နည္း ေလးထပ္ေျပာ ပါမယ္ ၊မသိတဲ.သူေတြ လဲ သိသြားေအာင္ ေပါ႔နာ္။
    MMAS FontChanger Downloadဆြဲရန္
    MMAS က ေရးထားတဲ. FontChanger ကို Install လုပ္ပါ။ျပီးလ်ွင္ Fontchanger ကုိဖြင့္ပါ။
    Superuser ကို Grant ကို ႏွိပ္ပါ။ျပီးလ်ွင္ ေဇာ္ဂ်ီေဖာင့္ေျပာင္းရန္ ကို ႏွိပ္ပါ။
    Restart က်သြား ပါလိမ္မည္။ဒါဆို Myanmar font ရသြားပါျပီးခင္ဗ်ာ။မအားတဲ. ၾကားတဲ. က ေရးလိုက္ရတာ ဆုိတာ မွားတာရိွရင္
    ခြင့္လြတ္ေပး ခ်င္ တယ္ခင္ဗ်ာ။
    ေအာင္ျမင္ ၾကပါေစခင္ဗ်ာ။

    Read More ->>

    Facebook Friend ေတြထဲမွာ ကိုယ့္ကို ဘယ္သူ block ထားသလဲ

    Facebook ေပၚမွာက ကိုယ့္ကို ဘယ္သူက Block ထားလဲ၊ Unfriend လုပ္ထားလဲ ဆုိတာ လူတိုင္း သိခ်င္တဲ့ ေမးခြန္း ျဖစ္ပါတယ္။ အဲဒီအတြက္ သိႏိုင္မယ့္ နည္းလမ္း ရွိပါတယ္။

    Facebook ကေတာ့ အဲ့လို သိႏိုင္တ့ဲ အခြင့္အလမ္းမေပးပါဘူး။ ေပၚလစီ အရ ပိတ္ပင္ထားပါတယ္။ သု႔ိေပမယ့္ App ထြင္သူ developer မ်ားကလည္း နည္းလမ္း အမ်ိဳးမ်ိဳးနဲ႔ ၾကိဳးစားပါတယ္။ အလြယ္ဆံုး နည္းကို ေတာ္ေတာ္မ်ားမ်ား သတိမထားမိခ်ိန္ App တစ္ခုကေတာ့ လုပ္လိုက္ပါတယ္။ ဒါကေတာ့ ကိုယ့္မွာ ရွိတဲ့ Friend အေရအတြက္နဲ႔ အဝင္အထြက္ကို မွတ္သားေပးတဲ့ App ျဖစ္ပါတယ္။ Who is hidding there အမည္ရ App ျဖစ္ပါတယ္။

    စသံုးတုန္းကေတာ့ ခပ္လွန္႔လွန္႔နဲ႔ စမ္းၾကည့္လိုက္ပါတယ္။ သင့္ကို Block လုုပ္ ထားသူ၊ Unfriend လုပ္ထားသူ၊ Delete လုပ္ထားသူ မရွိဘူးလို႔ ေျပာ ပါတယ္။ ပထမဆံုးအၾကိမ္ အသံုးျပဳသူအတြက္ကေတာ့ ၾကိမ္းေသအသံုးဝင္ မဝင္ မေသခ်ာပါဘူး။

    ဒီေတာ့ ေနာက္တစ္ၾကိမ္အသံုးျပဳမွ ရပါမယ္။ အဓိကကေတာ့ App နဲ႔ ထိေတြ႔ ေပးဖို႔ ျဖစ္ပါတယ္။ဒီေတာ့ ေအာက္ပါအဆင့္အတိုင္း သြားႏိုင္ပါတယ္။

    ၁။ ဒိမွာ ဝင္ပါ။

    ၂။ ဘယ္ဘက္မွ Login with Facebook ကို ႏွိပ္ရပါမယ္။

    ၃။ Go to App ကိုႏွိပ္ျပီး သာမန္ App သံုးတဲ့အတိုင္းေမးပါလိမ့္မယ္။ Allow လုိ႔ေျဖေပးရင္ ရပါျပီ။

    ၄။ ဒါဆုိ ကိုုယ္ဝင္ထားတဲ့ ဝဘ္ဆိုဒ္မွာ ကိုယ့္ကို ဘယ္သူေတြ Block ထားလဲ ဆုိတာ ေပၚသြားပါျပီ။

    ဒီမွာ ပထမဆံုးအၾကိမ္အသံုးျပဳသူမ်ားအေနနဲ႔ No one delete you / No one unfriend you on faceobok. ဆုိတာမ်ိဳးေပၚလာတတ္ပါတယ္။

    ကိစၥမရွိပါဘူး။ ေနာက္ေန႔မွာ ယင္း App ကိုျပန္ဝင္ၾကည့္ရင္ Block လုပ္ထားသူမ်ား၊ Unfriend လုပ္ထားသူမ်ားကို ျမင္ေတြ႔ႏိုင္ပါျပီ။ ရက္မ်ားမ်ားျခားေလ ေကာင္းေလပဲ ျဖစ္ပါတယ္။ ယင္း App နဲ႔ ကုိယ့္ အေကာင့္နဲ႔ ရင္းႏွီးသြားေစဖို႔ ျဖစ္ပါတယ္။ ဒါမွ သူ analyst လုပ္ေပးဖို႔ ျဖစ္ပါတယ္။

    အားလံုးေတာ့ ေတြ႔ရပံုမေပၚပါဘူး။ အေၾကာင့္အမ်ိဳးမ်ိဳးေၾကာင့္ အေကာင့္ ဖ်က္လိုက္သူေတြ၊ ကိုယ့္ကို Unfriend လုပ္သူေတြကို စာေရးသူ တကယ္ ျမင္ေတြ႔လိုက္ပါတယ္။ ကိုယ့္ကို Unfriend မလုပ္ေပမယ့္ Friend list မွာ ရွိေပမယ့္ လံုးဝ ဝင္မၾကည့္ျဖစ္သူ၊ သတိမထားမိသူ တစ္ေယာက္ကိုလည္း ေဖာ္ျပေပးပါတယ္။

    အေကာင့္ လံုျခံဳေရးအတြက္ App ကုိပထမအၾကိမ္သံုးျပီးရင္ Account setting မွာ ျပန္ဝင္ဖ်က္ထားရပါမယ္။ ေနာက္တစ္ၾကိမ္ အသံုးျပဳမွ ျပန္ဝင္လည္း ရပါတယ္။

    စာဖတ္သူတို႔ စမ္းၾကည့္လို႔အဆင္ေျပမယ္လို႔ ယူဆပါတယ္။
    Read More ->>

    အိႏၵိယ-ျမန္မာ ဆက္ဆံေရး


    အိႏၵိယႏိုု
    င္ငံကိုု ငါးရက္ၾကာသြားခဲ့တဲ့ ဗိုုလ္ခ်ဳပ္မွဴးၾကီးသန္းေရႊရဲ ႔ ခရီးစဥ္အတြင္း ျမန္မာ့ လူ႔အခြင့္အေရးဆိုုင္ရာ ေတြကိုု  အိႏၵိယဘက္က လူသိရွင္ၾကားေ၀ဖန္ေျပာၾကားျခင္းမရွိတဲ့ အတြက္  အိႏၵိယႏိုုင္ငံဟာ ဒီမိုုကေရစီစံႏႈန္းနဲ႔ တန္ဘိုုးထားမႈေတြကိုု ပစ္ပါယ္လိုုက္ျပီလားလိုု႔ ေ၀ဖန္မႈေတြရွိေနပါတယ္၊ ဒီအေၾကာင္းနဲ႔ ပတ္သက္ျပီး ဦးသန္းလြင္ထြန္းနဲ႔ အတူ  အိႏၵိယျမန္မာ ဆက္ဆံေရး ေလ့လာသူ ကြတ္ကီးအမ်ိဳးသား ငဲက်င္းေပါင္ကစ္ပ္ဂန္တိုု႔က ေဆြးေႏြးထားပါတယ္၊
    Read More ->>

    ZR Pictures

    1. Tasiama Se no neihna
    2. Fiaratui
    3. Fiaratui
    4. Fiaratui
    5. Tantlang
    6. Hriatloh
    7. Hriatloh
    8. Hriatloh


    Mizo Art Pictures / photos , mizo tlang pictures / photos, ram pictures / photos / mizo culture pictures / photos, Hmanlai nun picture / photos
    Read More ->>

    ဒိမွာ member လုပ္ရင္ Join this Site ကုိနွိက္ၿပိး Email ႏွင့္ယင္ပါ